

Creating a VS Code snippet extension
Creating a snippet extension for React Intl by FormatJS


Why do you want to create a snippet extension?
For me I use react_intl at work to create apps that allow you to change the language you want to see the app in. When I first started I found that the documentation was not always the clearest for this package and starting had a steep learning path when using it for the first time.
As I used it I created a few snippets locally that I use all the time but I have recently had a project that has caused me to increase what I used and again I had to learn what I needed.
I have created this as there is no snippet extension for VS Code react_intl and I think it will also help others learn some of the syntax involved in this package. It will also help me learn how to create an extension from start to finish
Creating the snippets package
Before we can begin we need to install the packages needed to start creating an extension
npm install -g yo generator-code
Once both of these packages are installed then you can start by typing
yo code
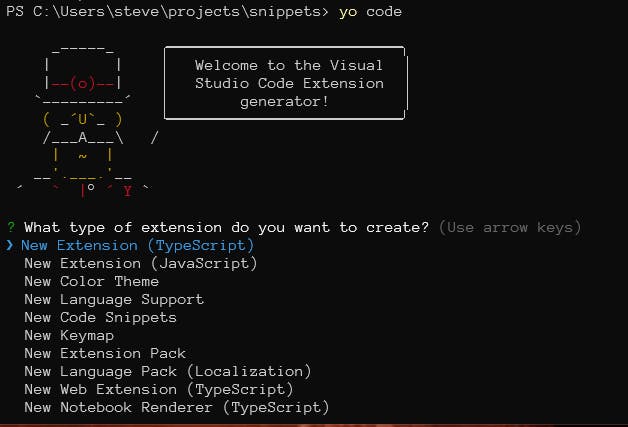
So here we are going to select code snippets and then you just fill in your details. As I want the snippets in this current folder I am going to leave the folder name blank but you can add one if you like. I am also leaving the description blank just now but I will fill it in later
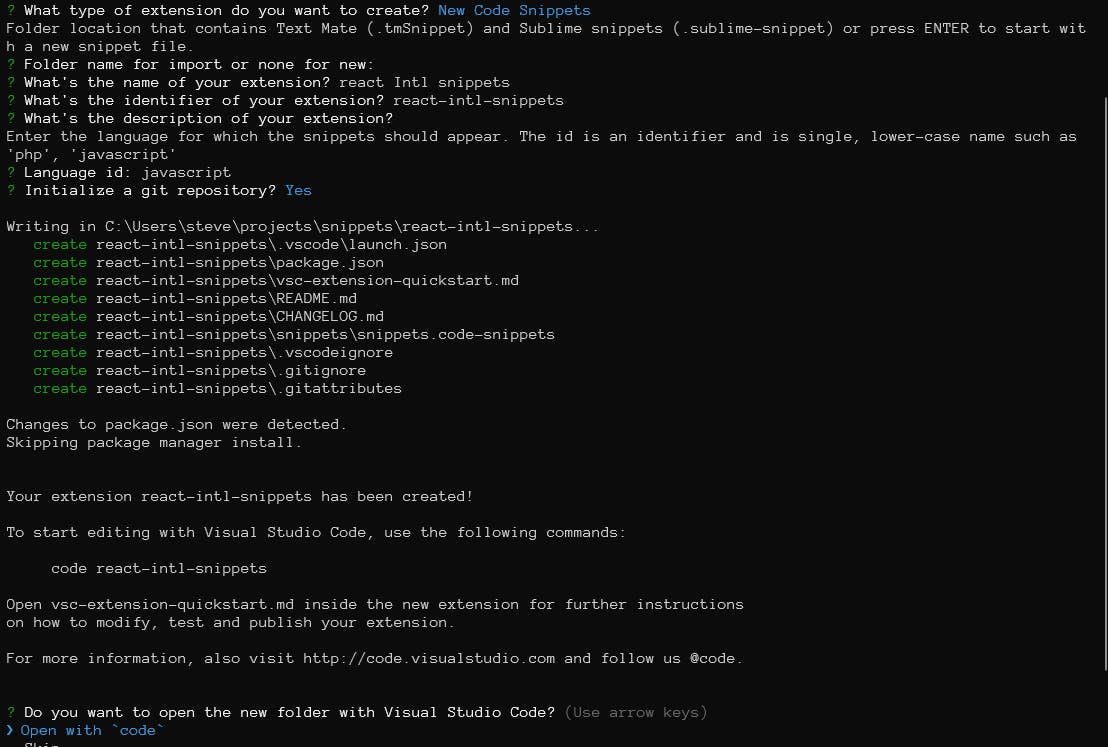
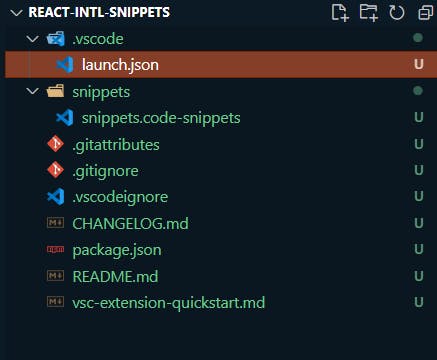
Now this is complete we can open VS Code and see the file structure that has been created
Configuring the snippets package
For my snippets, I am going to separate them into different files to help maintainability and to make it easier to find where the various parts are.
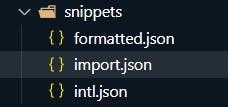
To begin with, I am going to split this into 3 files, formatted.json for all the components, import.json for all the import statements and intl.json for all the hooks. so, the snippets folder now looks like this:
Now that we have changed the files that we are using we now need to add these to the package.json file so it knows what files to use. Under contributes add the following and it was at this stage I updated the description as well
{
  "name": "react-intl-snippets",
  "displayName": "React Intl snippets",
  "description": "code snippets for when you are using React Intl",
  "version": "0.0.1",
  "engines": {
    "vscode": "^1.84.0"
  },
  "categories": [
    "Snippets"
  ],
  "contributes": {
    "snippets": [
      {
        "language": "javascript",
        "path": "./snippets/formatted.json"
      },
      {
        "language": "javascript",
        "path": "./snippets/intl.json"
      },
      {
        "language": "javascript",
        "path": "./snippets/import.json"
      }
    ]
  }
}
If the commands are different languages, then you can specify which files can be used for each language you want to support. I had to add each language for each path so this ended up being a lot longer
Writing your snippets
"Intl Formatted Message": {
        "prefix": "fmsg",
        "body": "<FormattedMessage id='${1}' defaultMessage='${2}' />${0}",
        "description": "React Intl Formatted Message"
    },
A snippet consists of a few parts, the key in this case, Intl Formatted Message is what shows when you type the prefix.
The prefix, in this case, fmsg is what you type into VS Code to bring up your snippet.
The description is displayed when you type in your prefix but then expand it to see more details.
The body is your actual snippet, in this case, it is just a string but if you wanted your snippet to span multiple lines to help the readability then you can use an array of strings like the example below
"Intl Formatted Message with value": {
        "prefix": "fmsgv",
        "body": [
            "<FormattedMessage",
            "id='${1}'",
            "defaultMessage='${2}<${4:b}>${3}</${4:b}>${5}'",
            "values={{",
            "    ${4:b}: chunks => (",
            "        <${6:span} className='${7}'>{chunks}</${6:span}>",
            "    ),",
            "}}",
            "/>${0}"
        ],
        "description": "React Intl Formatted Message with values"
    },
Here we can see the body of the snippet has spanned multiple lines and is just in the format of an array of strings.
In the second example above with the multiline body, you will see placeholders ${<number>}. These are tab orders you can add them anywhere you would like. When you have added your snippet, the cursor jumps to ${1} and then continues up the numbers with the final tab being ${0}. As you can see from the above example you can have two of the same number and when you tab onto them you will be able to edit both at the same time. If you would like to add some default text to your tabbed location then you can add a : then the text so it would look like ${1:<span>} this would automatically add a span tag if you just pressed the tab and didn't enter anything but will clear the text if you start typing.
Testing your snippets
Just Like anything else it is essential that you test your snippets to make sure that they work properly and the tab order is as you expect. This is very easy to do, with your Snippet VS Code window open press F5. This will run your snippets and open up a new VS code window. From here you can type out your snippets and make sure their title, tab order and description are all as you expect them to be.
Publishing your snippet
Now your snippets are ready and tested it is now time to publish them so others can download them.
Azure Dev Ops
If you don't have an Azure Dev Ops account then go to the Azure Dev Ops sign-in page. I had a Microsoft account so I used that to sign in but you can also create a new account if you prefer.
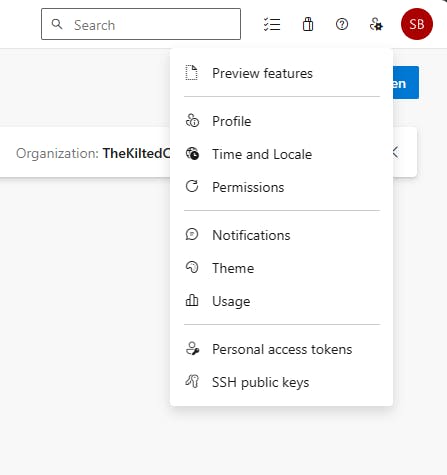
Once signed in you need to go to the top right of the screen to the icon just next to your profile initials or photo and click on it.
From here you are going to click on the personal access token and you will see this screen.
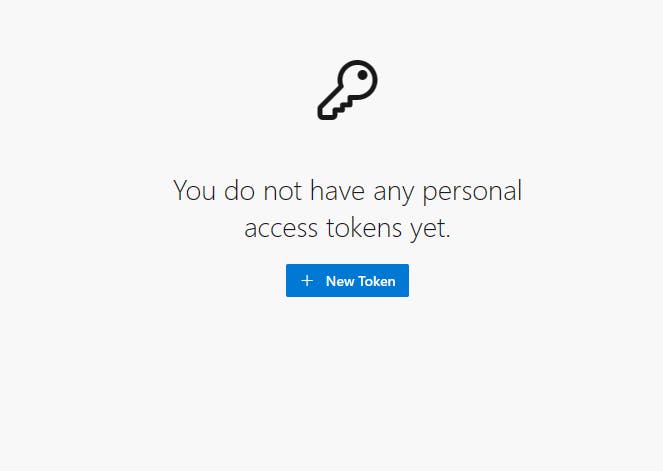
click to add a new token and fill in the form on the right of the screen.
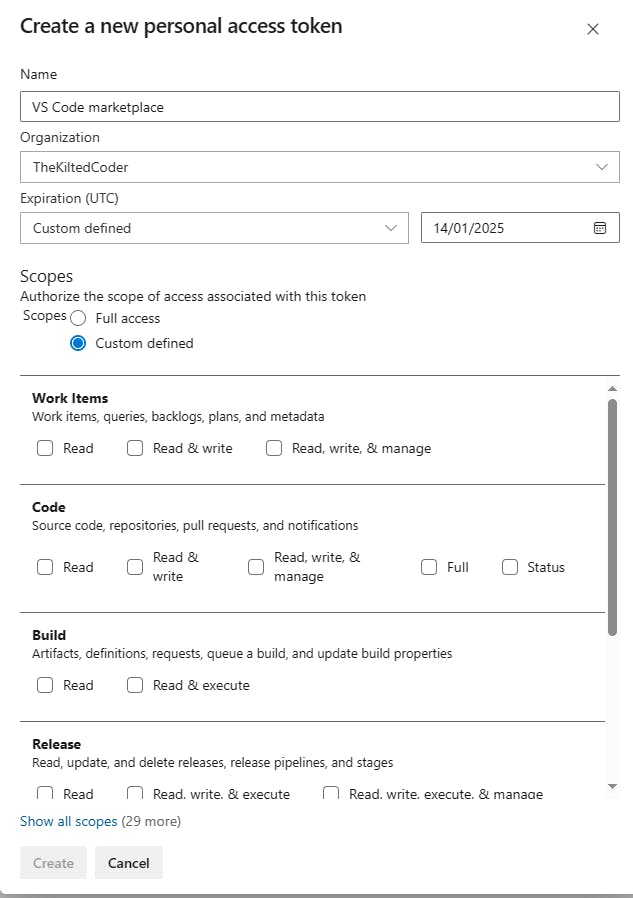
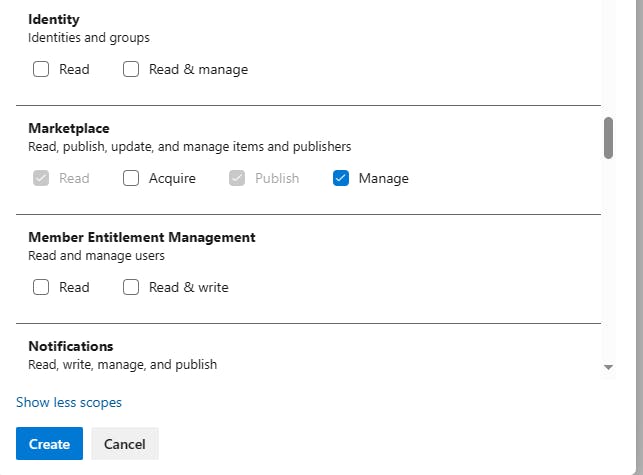
For the scopes, I have to click on the custom defined option and then show all scopes, scroll until you find Marketplace and then select manage and then click on Create.
Important - Here you will see your new key, copy this key somewhere safe as it won't be shown again so you must keep this in a safe place. I use the notes function of my password manager to store this.
Creating a publisher
The next stage is creating a publisher account so if you go to the create a publisher page, login in with the same account as your Azure and fill in all the information. The only mandatory fields are:
ID - which needs to be unique in Azure
name
Publishing your snippets
Now we have everything set up it is time to publish them to Azure. I had to install the vsce package again and I used
npm install -g @vscode/vsce
Now I just had to log in using the ID I made when I created the publisher

Next, it will ask for the personal access token that you saved somewhere safe earlier. after you paste this in you should now be logged in. From here I just used the publish command to upload the snippets to Azure.

Now if you refresh the publishers' page you will find your snippets have been uploaded are and under review.
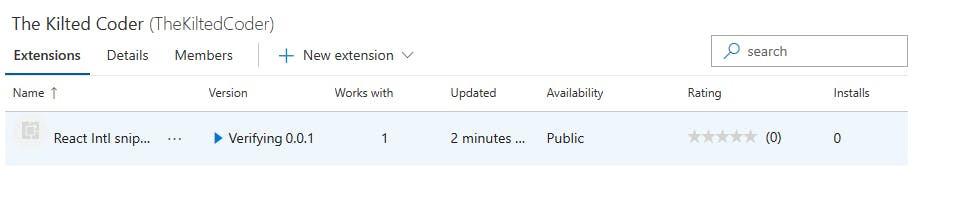
It took about 20 minutes for my snippets to be published and you can find them at My react Intl by FormatJS snippets page. From here you can also view my GitHub repo